Selling on Biklo from PrestaShop - step by step
On this page
Biklo for PrestaShop lists your shop's products on Biklo, keeps stock and prices in step, and brings Biklo orders into PrestaShop, where you accept and ship them. This guide takes you from installing the module to your first order and your first payout.
You need: a Biklo company account, PrestaShop 8.0+ (one shop - multistore is not supported yet), and a shop in the same currency as your Biklo account.
Start with a sandbox key (
bk_test_…). The sandbox is a copy of Biklo where nothing is real - no buyers, no payments, no courier. You can try everything below, including orders, before you switch to a live key.
1. Install the module
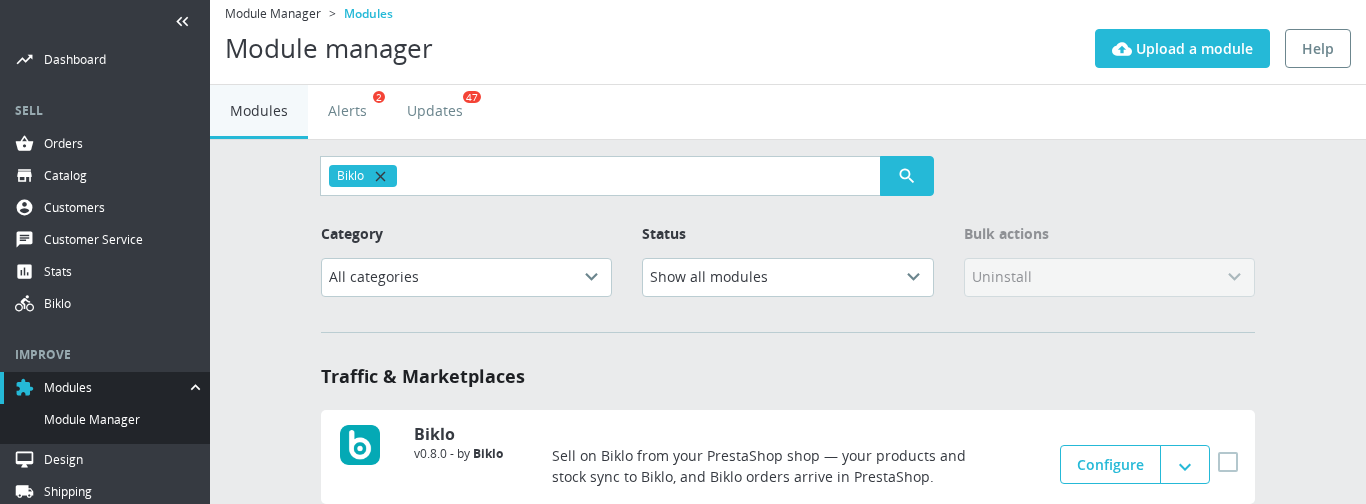
Modules → Module Manager → Upload a module → choose biklo-<version>.zip. When
it is installed, the module appears in the list (search "Biklo"); Configure opens it.

A Biklo entry appears in the menu, under Sell, with its six screens.
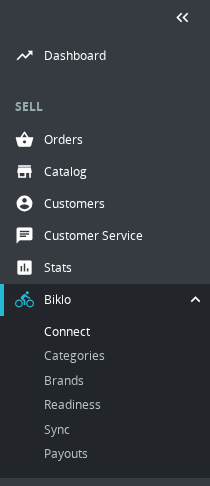
Every Biklo screen has the same header: which Biklo you are connected to (Sandbox or Live), Get help, and the setup steps in order - Connect, Categories, Brands, Readiness, Sync, Payouts.

2. Connect your Biklo account
- On biklo.ro: My account → API integrations → New integration. Copy the
bk_test_…key (the sandbox) - orbk_live_…when you go live. - In PrestaShop: Biklo → Connect, paste the key in API key, then Test connection.
- You should see Connected as …, Sandbox and All required permissions granted. Save changes.
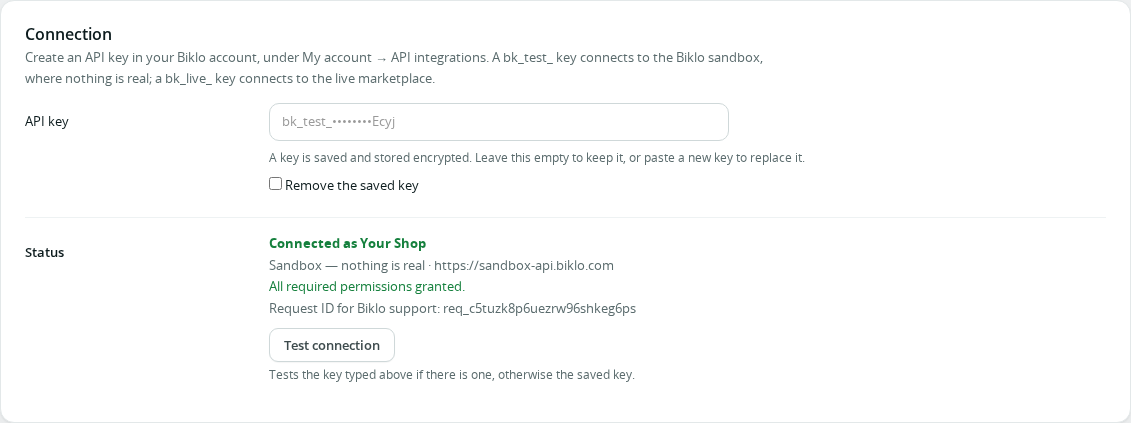
The key is stored encrypted and never shown again - only its last four characters.
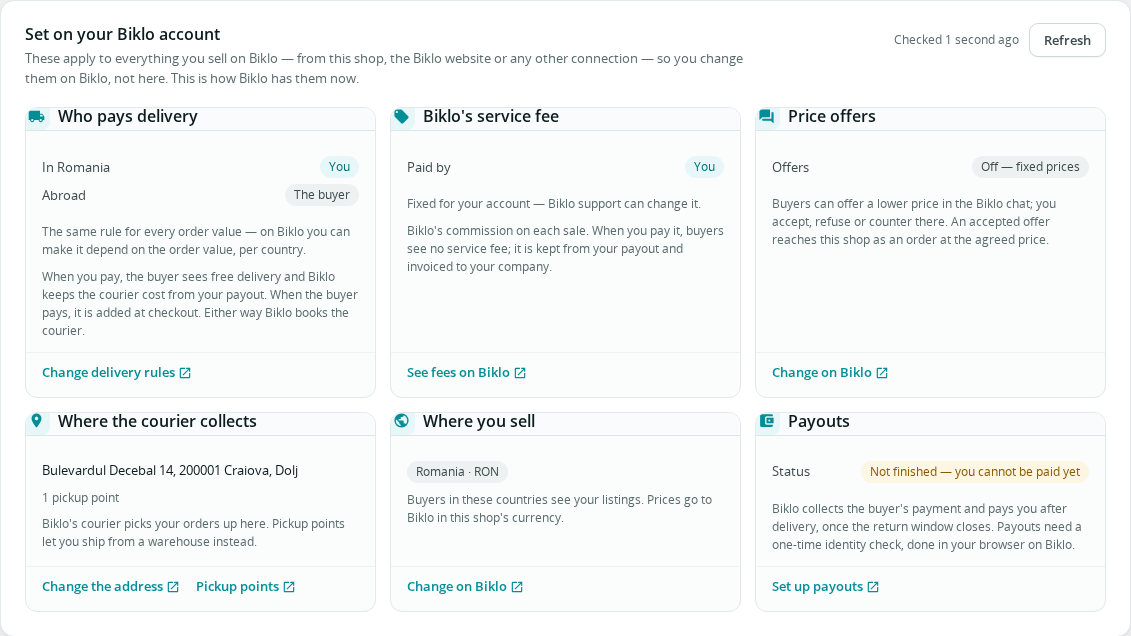
What is set on your Biklo account
Below the connection, the module shows what you set on Biklo itself - not here - because it applies to everything you sell on Biklo: who pays delivery (in your country and abroad), Biklo's service fee, price offers, where the courier collects, the countries you sell to, and your payouts. Each card says what it means and links to the page on Biklo where you change it.
Orders from Biklo (the webhook)
Biklo tells your shop about new orders the moment they happen, at the address shown here. Leave Registered by: the module - it is set up for you when the sync starts. Without it, orders still arrive, checked every 10 minutes.
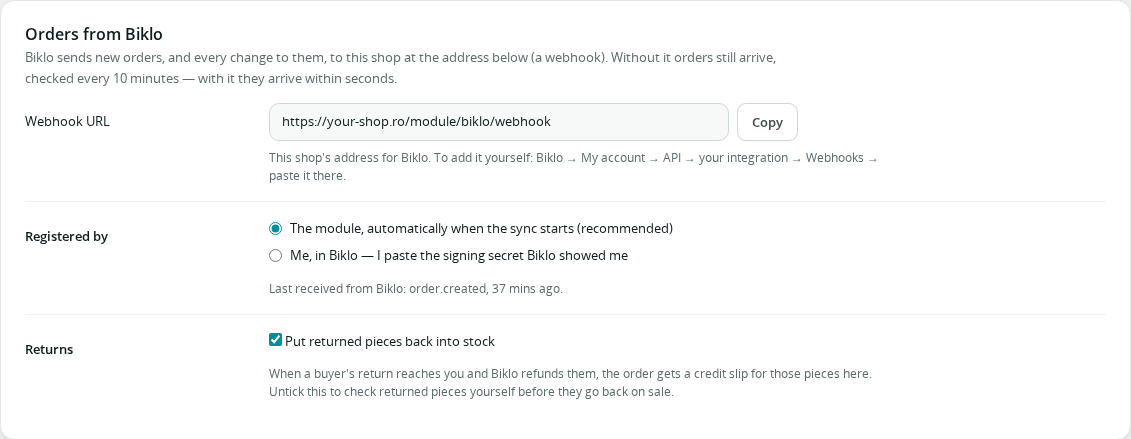
Returns: whatever Biklo refunds on a return is recorded on the order as a credit slip. Untick Put returned pieces back into stock if you want to check returned items before they go back on sale. See Returns.
3. Map your categories
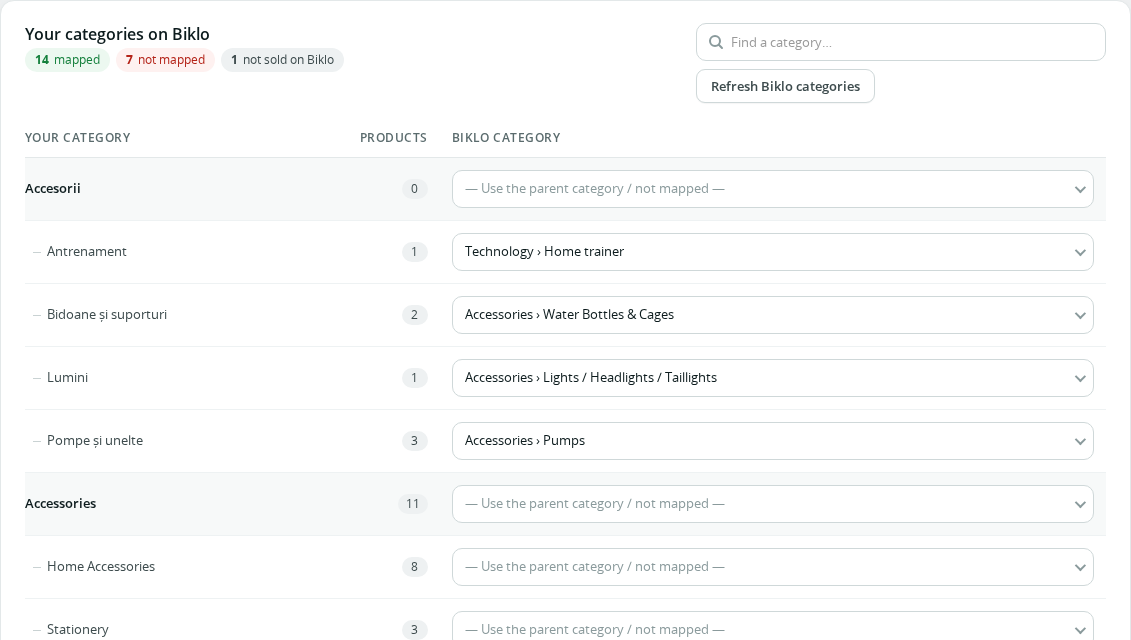
Biklo needs a Biklo category for every product. Biklo → Categories: choose the closest Biklo category for each of yours. Suggestions are pre-filled (check and save); a subcategory left empty uses its parent's choice; choose Don't sell this category on Biklo for things like gift cards. Save changes.
4. Map your brands
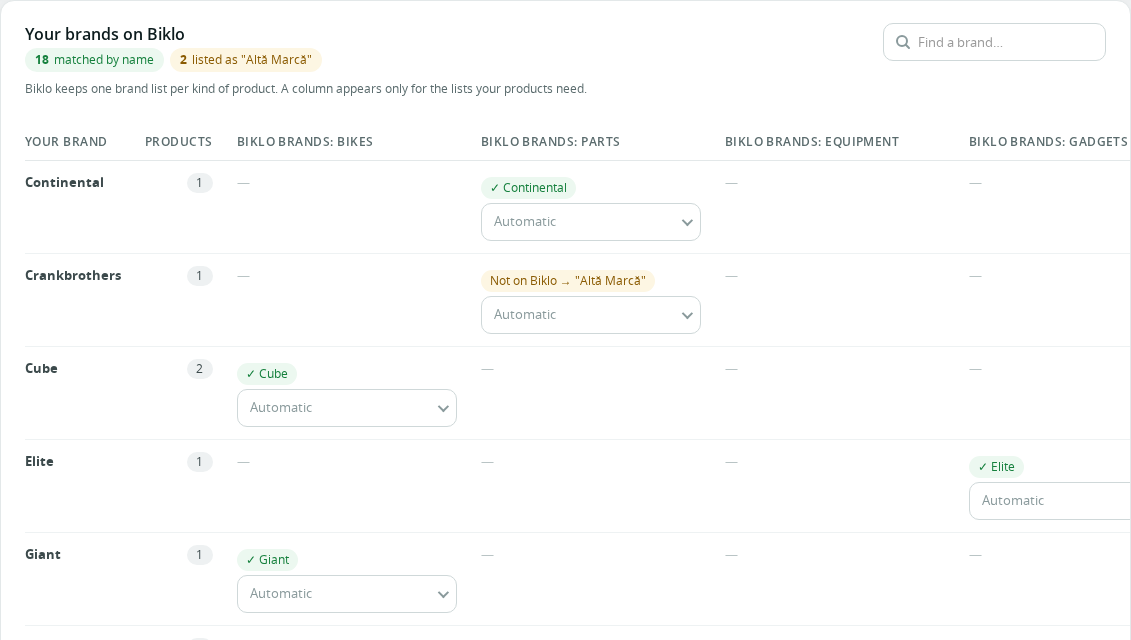
Biklo → Brands. Choose where your brands come from (PrestaShop's Brands - manufacturers - or a product feature). Your brands are matched to Biklo's by name; a column appears only for the Biklo brand lists your products need. A brand Biklo does not know is listed as Altă Marcă - or held back until you choose one, if you prefer.
5. Check readiness
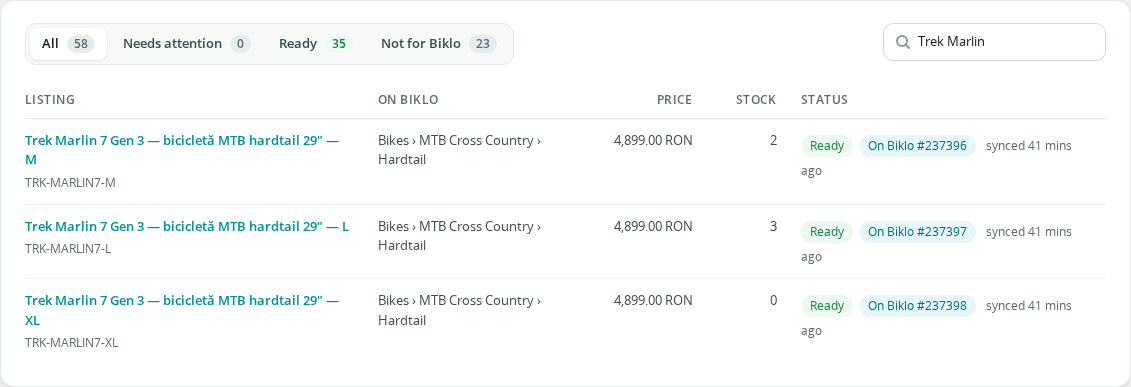
Biklo → Readiness checks every product against Biklo's rules before anything is sent, and says exactly what to fix: a title too short or too long (Biklo counts bytes: ă, ș, ț count twice), a missing description, a category not mapped… The search finds any product in the shop by name or reference.
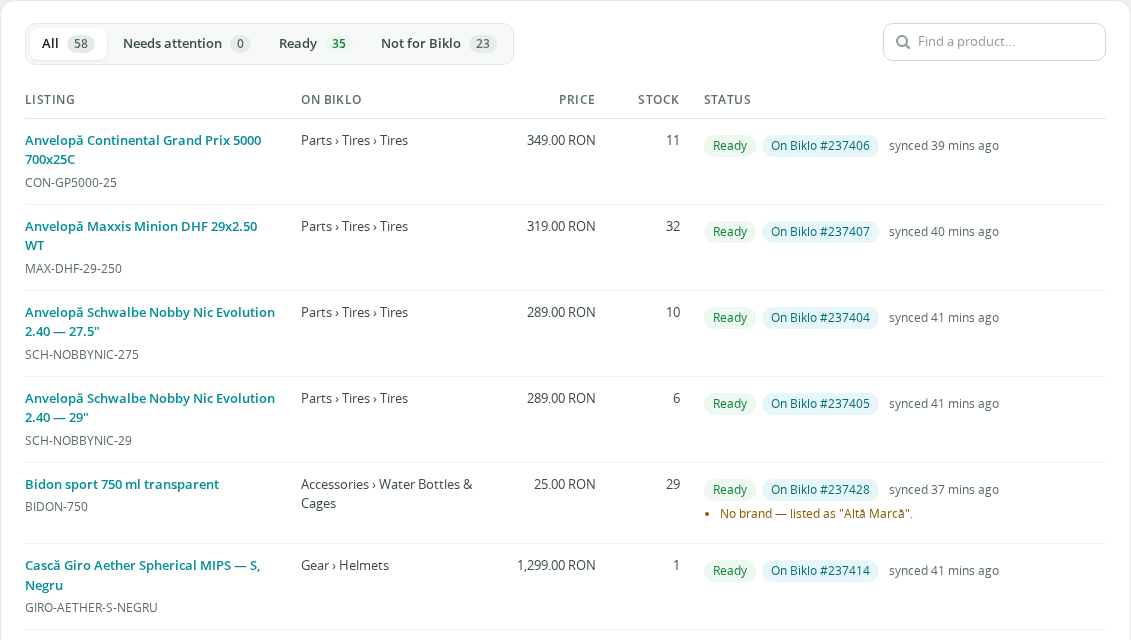
Combinations (sizes, colours) are listed one per combination, each with its own stock, and shown on Biklo as one product with a picker:
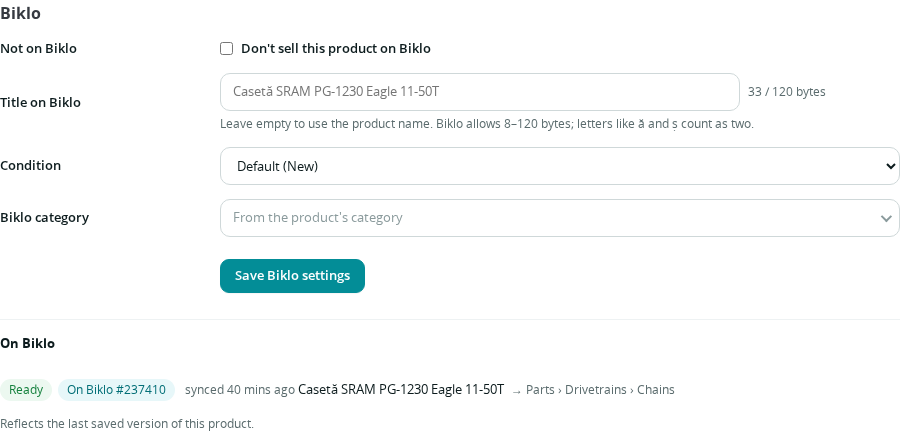
The product's Biklo panel
On a product's page, under Modules → Biklo (Configure): keep a product off Biklo, give it a Biklo-only title (with a byte counter), a condition, or a different Biklo category, then Save Biklo settings - the product is checked again right away and you see where it is on Biklo.
6. Start the sync
Biklo → Sync → Start syncing. Ready products go to Biklo in the background, with their images. From then on only changes are sent: stock and price as they change (also after an order in your shop), everything else when you edit a product. A product you disable or delete is taken off Biklo, and put back when it returns.


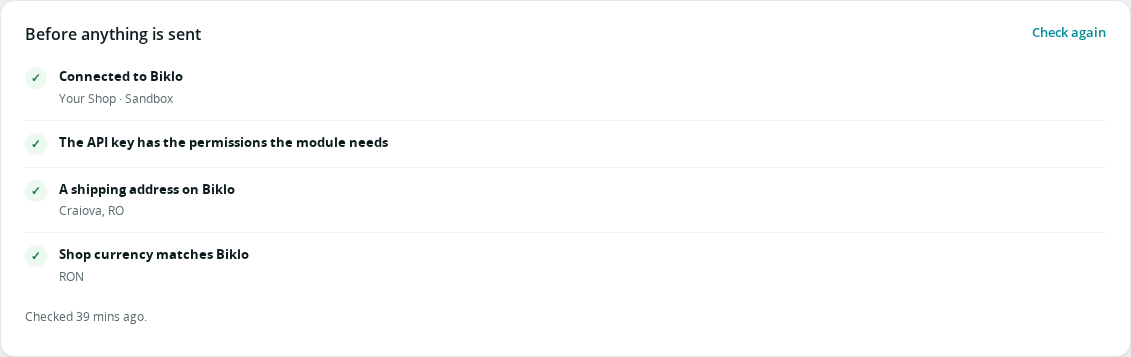
The checks must be green - connected, permissions, a shipping address on Biklo, and the shop's currency matching your Biklo account:
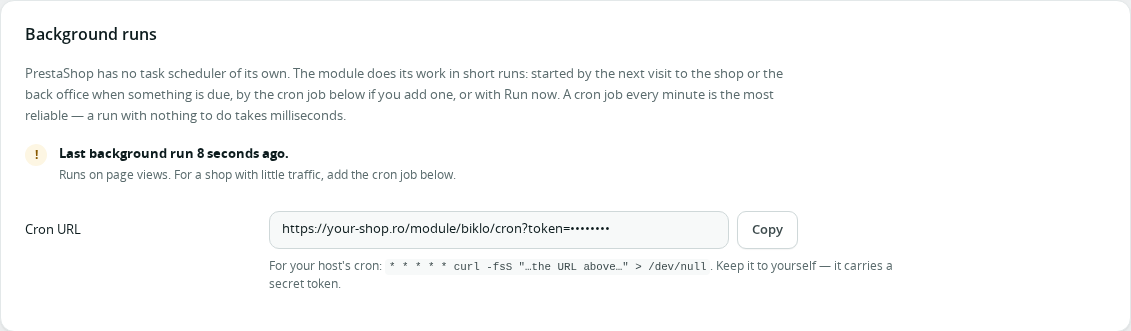
Background runs
PrestaShop has no task scheduler of its own, so the module works in short runs started by visits to your shop or back office. For a shop with little traffic, add a cron job that calls the Cron URL every minute (your host's control panel has a "Cron jobs" page) - or install PrestaShop's Cron tasks manager module, which the Biklo module uses on its own. The URL carries a secret token: keep it to yourself.
Activity says, in plain words, everything the module did:
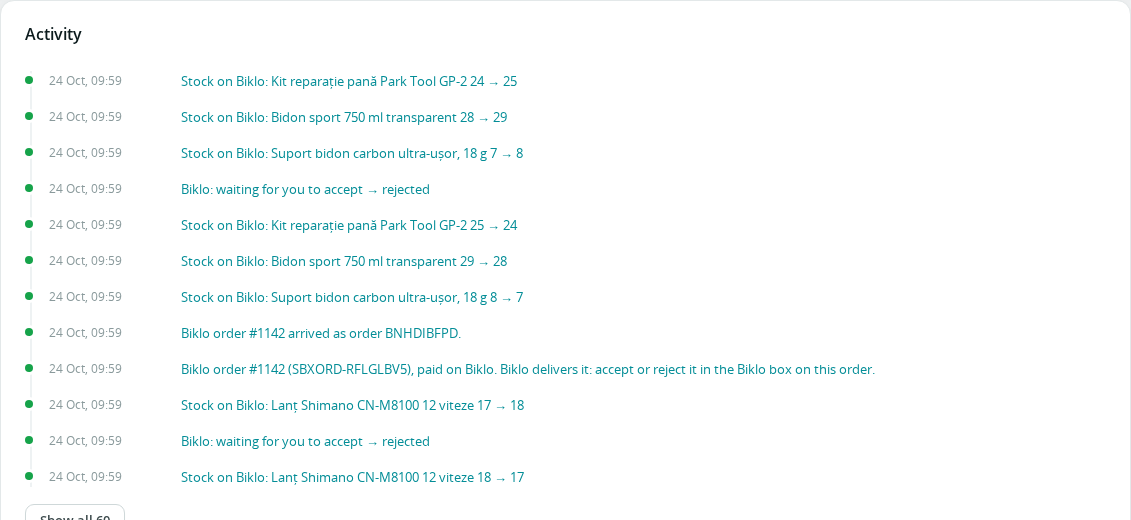
In the sandbox, try an order without a buyer: Biklo → Sync → Sandbox: try an order creates one from a made-up buyer.
7. A Biklo order arrives
It appears in Orders, already paid (Paid on Biklo, carrier Delivered by Biklo at 0), as Payment accepted, with the stock taken. The Biklo column says what to do next.

Open it. The Biklo box on the right of the order is where you handle it:
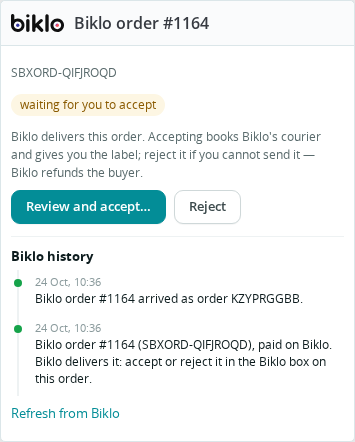
Biklo emails the buyer - PrestaShop's own customer emails are off for Biklo orders.
8. Accept it - and check before the courier is booked
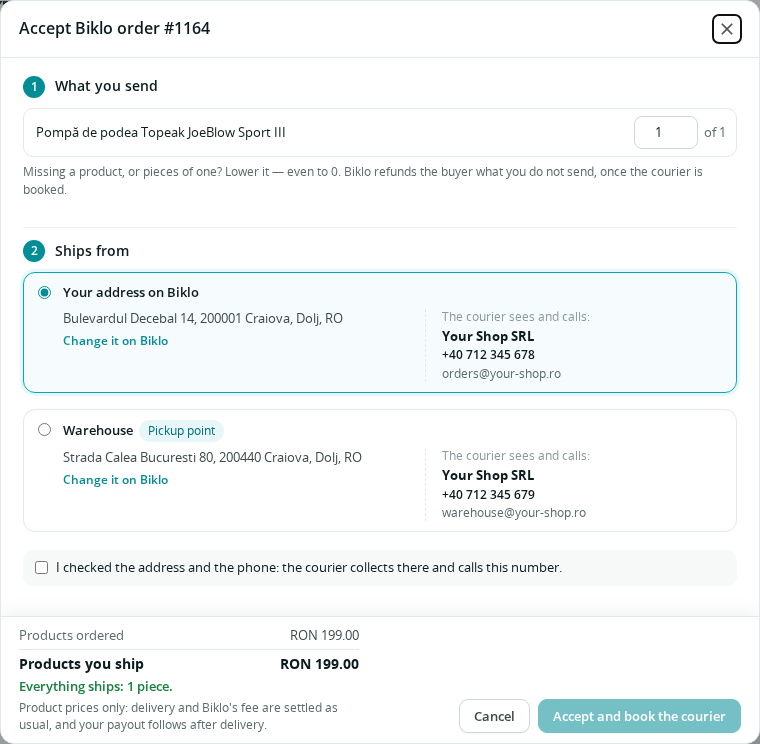
Review and accept… opens the last check before Biklo books its courier:
- What you send - lower a product if you are short, even to 0. Biklo refunds the buyer what you do not send.
- Packing (with several products) - everything in one box, or one box per product.
- Ships from - your address on Biklo or one of your pickup points, with the exact name, phone and email the courier gets. Change it on Biklo if something is wrong.
- The summary shows what ships and what the buyer gets back.
Tick I checked the address and the phone → Accept and book the courier.
The order becomes Processing in progress and the courier is booked: print the Label (PDF) (or ZPL), stick it on the parcel and hand it to the courier. You can also send Biklo a link to your invoice for the buyer. Biklo history in the box keeps everything that happened to the order.
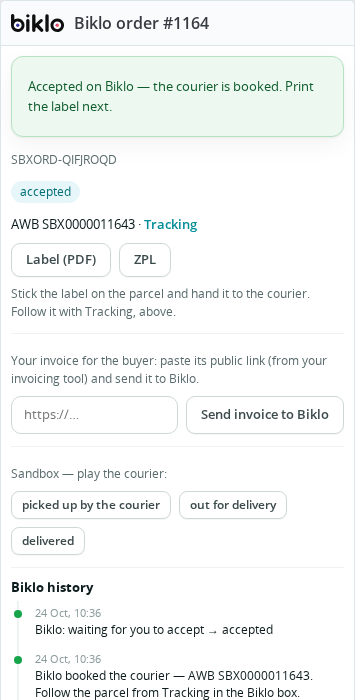
Tracking shows the parcel's journey right there, without leaving the order:
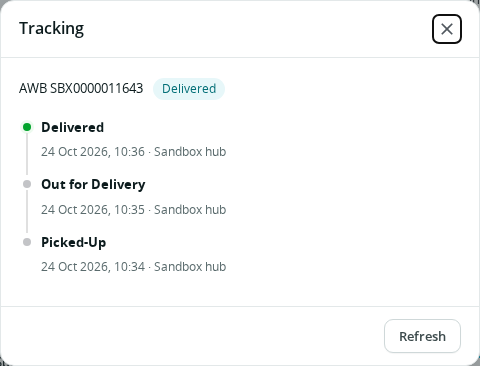
When the courier delivers, the order becomes Delivered.
Returns. If the buyer sends something back, Biklo holds the money meanwhile. When the parcel is back with you, the Biklo box shows Back with you and Decide by … (48 hours), and the orders list says check the returned product. Check it, then Accept the return (Biklo refunds the buyer) or Reject the return, saying what is wrong (the Biklo team decides). Whatever happens is recorded on the order as it happened - a credit slip for a refund, a note when there is none. Every case, step by step, with pictures: Returns.
Cannot send it at all? Reject - Biklo refunds the buyer, the order is Canceled and PrestaShop puts the stock back.
9. Get paid
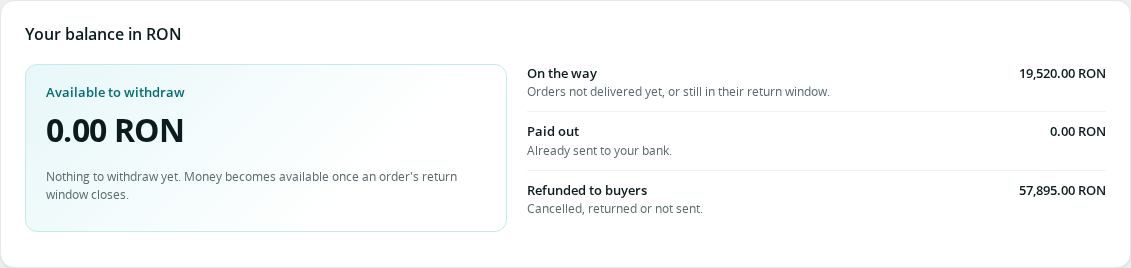
Biklo → Payouts. Biklo collects the buyer's payment and pays you after delivery, once the return window closes. The first time, finish your payout account on Biklo (a one-time identity check by Stripe, done in your browser): the card says exactly what is missing.

Then your balance shows what is available; Withdraw sends it to your bank.
10. Going live
When everything works in the sandbox: create the live key on Biklo
(bk_live_…), paste it in Biklo → Connect, save, and start the sync. Your products
are listed on the real marketplace.
Need help?
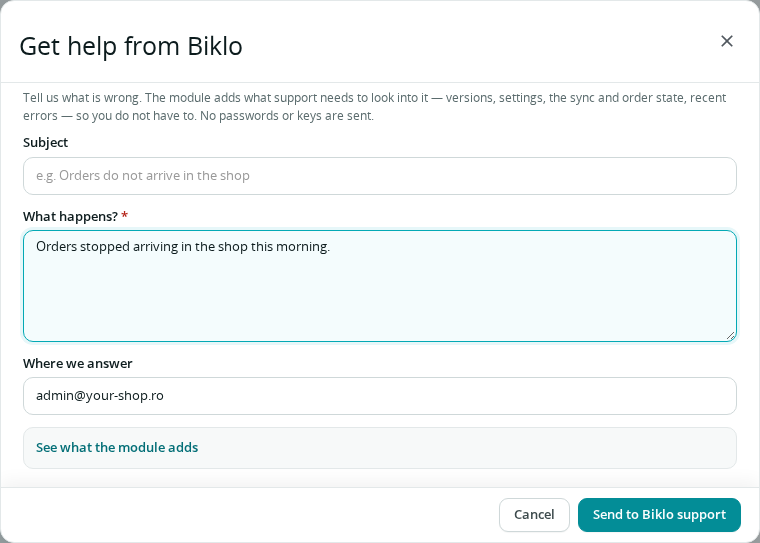
Get help is on every Biklo screen. Describe the problem: the module adds what our support needs - versions, settings, the sync and order state, recent errors, never your keys - and you can read it first. You get a reference, and we answer by email.
The screenshots are generated from the module itself
(dirtbike-integrations-dev/e2e/prestashop/tutorial.spec.ts,
E2E_TUTORIAL=1), so they can be refreshed whenever a screen changes.